December 19, 2014

How to Make Dried Orange Ornaments

decorating the tree

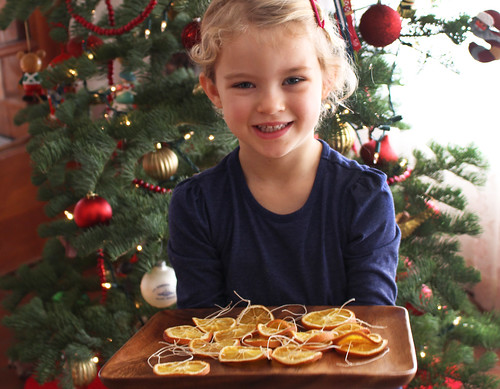
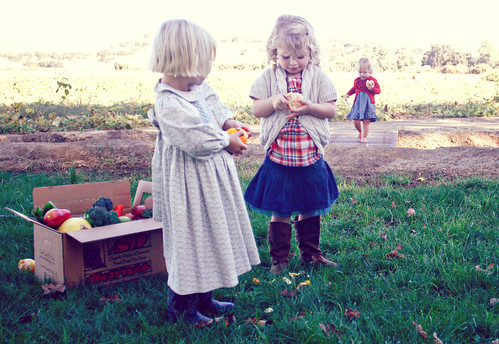
Ainsley helps to decorate the family Christmas tree

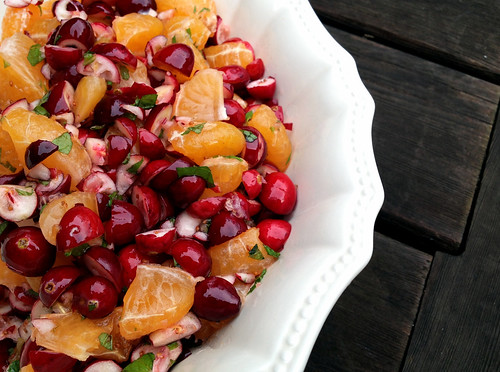
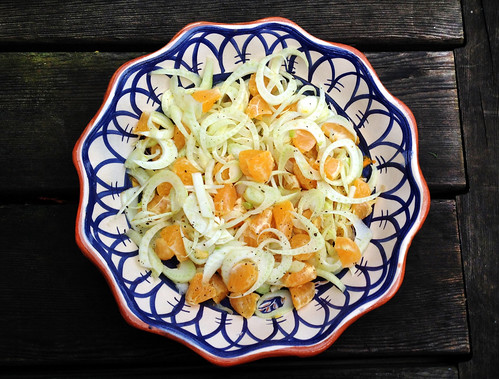
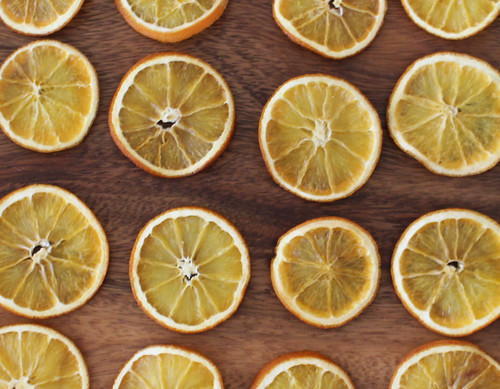
Each year we try to make something natural and eco-friendly to add to our tree decorations. This year we landed on citrus ornaments, which make such a cheerful and fragrant addition. Although we chose oranges this year, lemons and grapefruit would also work well. 

Dried Orange Slices


This is a very simple craft to do with your little ones and will make a colorful impact on your Christmas tree.

Making Dried Orange Ornaments

Imogen Prepares to Thread the Orange Slices
DRIED ORANGE ORNAMENTS

Makes 20 Ornaments

WHAT YOU NEED:

5 oranges
1 sharp knife

needle & thread
baking Sheet
oven

DIRECTIONS:

Preheat oven to 200 degrees.Using a sharp knife, slice oranges thinly, you should be able to get 5 nice slices per-orange. Lightly dab off any extra juice with a towel.


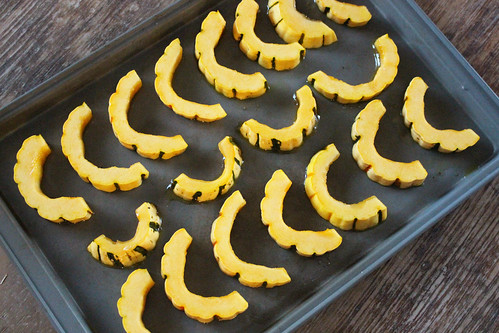
Arrange orange slices on a baking sheet and put into oven for two hours.
Reduce oven heat to 140 (that is as low as mine goes) and remove the orange slices from the baking sheet and place directly on rack. 

Turn slices once after about an hour to keep them from curling or sticking. Turn off oven and leave overnight. 

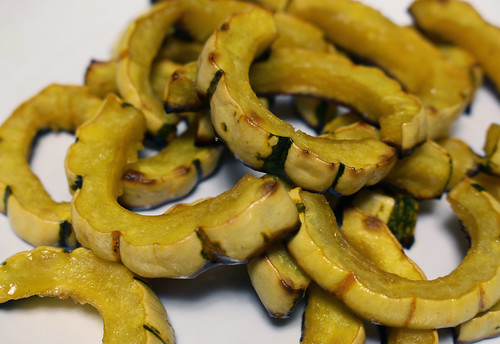
The following morning, remove slices from oven. Use a needle to thread a string through the orange slice. Tie in a knot to make a loop.

And that’s it! With minimal effort, you have 20 all-natural rustic ornaments to adorn your tree with. And since you made them by hand, you get bragging rights when guests visit for the holidays and comment on your lovely and unique tree ornaments.

To find this craft and other seasonal recipes, visit our website.

We want to wish everyone a safe and healthy holiday season!

Orange Slices Ornaments

December 11, 2014

Yolo Press Extra Virgin Olive Oil

Yolo Press Olive Oil

Yolo Press Organic Extra Olive Oil

We have been eagerly awaiting the arrival of the Yolo Press extra-virgin olive oil and it's finally here! We have a very limited supply of this local treasure to offer to our Northern California Farm Fresh To You customers. This would make a great gift for the holidays but we understand if you would prefer to keep it all to yourself.

Mike and Dianne

Diane and Mike Madison

Yolo Press is a small, family-run farm in Yolo county that was started by Diane and Mike Madison. The farm originally specialized in growing flowers, however, Mike was seeking another crop that worked well with the flower-growing operation, and they settled on planting an olive orchard.

Harvesting Olives

Colin and Susan (apprentices of Diane and Mike)

Turns out, olives were a great idea and Mike eventually bought his own olive-oil press to turn out some of the best organic olive oil around. The oil that we are offering our Farm Fresh To You customers is a blend of Tuscan varieties, primarily Frantoio and then combined with Leccino and Pendolino. It has a good balance of fruitiness and pepper on the back of the throat, indicating that it's chock full of those good polyphenols.
The produce building at Yolo Press


The produce building (built by Mike) houses the olive oil press and Dianne's jam kitchen.

Enjoy this extra-virgin olive oil with bread, drizzled over pasta or use it to cook your favorite meal. With the shortage of Italian oils this year, get the good stuff from close to home.

How To Add Yolo Press Olive Oil to Your Delivery:
CSA members - head on over to our online Farm Stand Market to customize your upcoming delivery. Market is open from noon on Thursday until 10 am, 2 days before your scheduled delivery day. After you confirm your produce items, click the orange button "Confirm and Continue To Other Farm Products" to add the products to your delivery.


December 8, 2014

Rain!

Your Farm News in Photos - Rain!
The first storm took three days to delivery three quarters of an inch.

In one week, the lingering Capay fall was flooded by winter. The pitter-patter of rain drops on the roofs was a welcome sensation. The monitoring of the rain gauge in the equipment yard was an exciting event. The first little storm took three days to deliver three quarters of an inch – enough to only wet everything. There was one sunny day, then the next system moved in from the west, first stacking up over the coastal foothills and then flooding the farm with showers.

Your Farm News in Photos - Rain!
In two days we received two and one quarter inches of rain!

This storm was much more exciting. In two days we received two and one quarter inches of rain. By this time, the ground was saturated. All of this water hit the trees and plants followed them down to the soil and then began the slow and methodical journey down, down, down, ending in the creek. The furrows in the fields were filled with water.

Your Farm News in Photos - Rain!
The sediment trap near the event site. Finally enough water to cause runoff!

The sediment traps filled with water. Every low spot on the farm turned into a small pond. Below all of those points was a steady stream of rain water brown with sediment that was working its way towards the creek. This is the kind of event that adds water to our reservoirs. This is the moisture that will be used to water our crops next summer.

Your Farm News in Photos - Rain!
Every low spot on the farm turned into a small pond.

The entire farm is enjoying the forced changes that rain brings. The office bustled with the chatter of people at work, who can’t work because of the rain.

The cover crops that had been sitting in the dry dirt waiting have sprung to life. They have popped up in the neat lines in which they were planted. Soon they will make the whole field green, and the soil will no longer be visible. The leaves of the fruit trees have been washed from their branches and lay on the ground ready to be incorporated into the soil again – their trees stand tall and bare.

Your Farm News in Photos - Rain!
Our tractor, rigged with our ripper and ring roller, grounded while we wait for the soil to soak up the rain. 

This last storm was a step in the right direction, but we will need many more this winter to adequately quench the thirst created over the last two years. Let’s us hope this is only the beginning of a wet few months.

Your Farm News in Photos - Rain!
Follow us on Instagram (farmfreshtoyou) and (farmerthaddeus)!

You can follow us on Instagram (farmfreshtoyou) and (farmerthaddeus). We post pictures and captions of what is going on with our farm each week.

November 20, 2014

Thanksgiving Recipes

farm fresh to you family

Soon tables will set to share holiday meals with friends and family. In our family, this sharing of meals is part of what makes it the happiest season of all. Here's a little collection of seasonal recipes for those still looking for something fresh to try.

You can add any of the produce items found in these recipes and more to your upcoming delivery by Customizing Your Box in our Farm Stand Market both this week and next week. Take care and have a delicious and warm holiday! 
roasted pear scone


Roasted Pear and Cinnamon Scones with Chocolate Chunks  

Greet the morning with the smell of roasted pears and freshly-baked goods. This amazing scone recipe from one of our CSA members, Holly, is sure to pack a punch in the aroma department. This is one way to rouse family members and house guests out of their beds.

INGREDIENTS:
3 or 4 pears, peeled, cored, and chopped into 1″ pieces
1 1/2 cups all-purpose flour
1/4 cup granulated sugar, plus additional for sprinkling
1 1/2 teaspoons baking powder
1 teaspoon ground cinnamon
1/2 teaspoon salt
6 tablespoons cold unsalted butter, cut into 1/4″ cubes
1/4 cup unsweetend vanilla almond milk
1/4 cup semisweet or dark chocolate chunks
2 eggs, one for dough, one for egg wash

DIRECTIONS:

Preheat oven to 375°.

Place pear chunks on lightly greased baking sheet. Roast the pears until lightly browned and dried, about 20 minutes. Remove the pears from oven and allow to cool completely.

In a large mixing bowl, combine flour, sugar, baking powder, cinnamon and salt. Stir together until the dry ingredients are combined. Add the cooled pear chunks, butter cubes, almond milk, and one egg to the dry mixture. Stir until just combined, don’t over mix. Add the chocolate chunks to the dough and stir 5 seconds longer.

On a well-floured surface, place dough mixture and pat to a 6-inch round. Cut into 6 wedges and transfer to baking sheet, making sure to allow at least 2 inches of space between each scone. Whisk the remaining egg in a small bowl with 1 teaspoon of water and a pinch of salt. Brush the egg wash over each scone and sprinkle with sugar.

Bake scones for 25-30 minutes or until golden brown. Transfer to a cooling rack and serve when scones reach room temperature.

Author: Holly Harshman
Source: www.buttercupandbourbon.com


*          *          *


Cranberry Satsuma Relish 

Some of you may already have our Mom's cranberry satsuma relish recipe from when she first shared it in our CSA box newsletters. Some folks are surprised to find that the cranberries are raw - but that's what makes this sweetly-tart recipe so fresh-tasting and delicious. The mint makes an unusual but addicting addition. Will it become a new favorite in your family?

Makes: 3 cups

INGREDIENTS:
2 cups fresh cranberries
6 satsuma mandarins, peeled, sectioned and halved
1/2 cup sugar
1/4 cup packed fresh mint, chopped

DIRECTIONS:
Coarsely chop cranberries. Transfer to a bowl. Add mandarins, sugar and mint. Toss well. Serve.

Author: Kathy Barsotti (Farm Fresh To You)
Source: www.farmfreshtoyou.com


*          *          *


fennel and mandarin salad

Fennel and Mandarin Salad 

If you're looking to add a light salad to the table this holiday, this is a simple, delicious and healthful solution. Thin slices of fennel combine with juicy bits of mandarins in a nice pairing.

INGREDIENTS:
2 fennel bulbs
4 Satsuma mandarins
2 tbs olive oil
2 tbs white wine vinegar
salt and ground black pepper to taste

DIRECTIONS:
Remove stalks from fennel and thinly slice using a sharp knife or mandoline. Peel mandarins, break into segments and cut each segment into halves, reserving some for one tbs juice.

Add fennel and mandarin oranges with a tablespoon of the orange juice in a bowl. Add the olive oil and vinegar. Season with salt and pepper; stir. Allow to sit 10 to 15 minutes before serving.

Author: Kathy Barsotti (Farm Fresh To You)
Source: www.farmfreshtoyou.com


*          *          *


sage and brown-butter scalloped sweet potatoes

Brown Butter and Sage Scalloped Sweet Potatoes

This potato side dish is sure to take center stage at Thanksgiving. It incorporates all of our favorite fall flavors including sweet potatoes, sage and nutmeg. Go ahead, stir up this dish and see how many people ask to swap recipes at your holiday get together. Thanks again to Holly, one of our CSA members for sharing.

INGREDIENTS:
5 cups sweet potatoes or yams, sliced to 1/8-inch thin rounds
3 tablespoons unsalted butter
3 fresh sage leaves, minced
2 tablespoons all-purpose flour
3 cups unsweetened almond milk
1 teaspoon salt
1/4 teaspoon pepper
1/4 teaspoon ground nutmeg
1/2 cup shredded Parmesan cheese, divided

DIRECTIONS:

Preheat oven to 350º.

In a saucepan over medium high heat, melt the butter and whisking frequently until it begins to brown, about 5 minutes. Add the minced sage to the brown butter and allow to cook until crisp, about 30 seconds. Add the flour to the brown butter and stir to combine, then add the almond milk, salt, pepper, nutmeg, and 1/4 cup of the Parmesan cheese to the saucepan. Stirring constantly, cook until the cheese has melted and the sauce begins to thicken, about 5-7 minutes. Remove from heat and set aside.

In a 9×9 casserole dish, place half of the sweet potatoes and cover with half of the cheese sauce. Top with the remaining sweet potatoes and then top with the remaining cheese sauce. Finally, top the scalloped potatoes with the remaining Parmesan cheese.

Bake uncovered for 60 minutes or until potatoes are soft when you insert a knife into the middle of the casserole. Let stand for 5 minutes before serving. Enjoy!

Author: Holly Harshman
Source: www.buttercupandbourbon.com


*          *          *


sweet potato pie slice

Gluten Free Sweet Potato Pie

Looking for a quick and easy gluten / dairy / nut free dessert option for Thanksgiving? Try this very simple and delicious Sweet Potato Pie recipe from one of our CSA members, Sandi, that will allow all your guests to partake in the fine art of pie tasting.

Serves: 6 - 8

INGREDIENTS:
¾ cup roasted sweet potato puree
¾ cup coconut sugar
¼ teaspoon nutmeg
⅛ teaspoon salt
1 teaspoon cinnamon
1 teaspoon vanilla
1 cup light coconut milk
2 large eggs
1 gluten free pie crust

DIRECTIONS:

Preheat the oven to 350 degrees.

In a large bowl, add sweet potatoes and all other ingredients.

Use a hand mixer to mix the ingredients (this will help puree the sweet potato so it is smooth).

Pour the ingredients into the ready made crust.

Bake 20-25 minutes until the middle is done.

Author: Sandi Gaertner
Source: www.fearlessdining.com


*          *          *


wine poached pears

Wine-Poached Pears with Ricotta Cream

These pears are poached in a light red-wine syrup that creates a lovely two toned effect once you dice and fan the pears to reveal a creamy interior wrapped in a ruby red syrup. Serve with a dollop of whipped and sweetened ricotta or cream. This recipe was shared with us by the wonderful author Janet Fletcher.

Serves: 2

INGREDIENTS:
1 cup dry red wine with rich color (such as Zinfandel)
1 cup water
1/3 cup sugar
1 orange zest strip
2 ripe, but firm pears
1 cup whole-milk ricotta cheese
1 Tbs sugar
1/4 tsp vanilla extract
1 Tbs very finely minced pistachio

DIRECTIONS:

Put the wine, water, sugar, and orange zest in a small saucepan. Bring to a simmer over moderate heat, stirring until the sugar dissolves. Peel the pears with a vegetable peeler. Add them to the simmering liquid, setting them on one side. Cover with a round of parchment paper and tuck the edges of the parchment under the liquid to keep the paper inplace. Adjust the heat to maintain a gentle simmer and cook for 15 minutes.

Lift the parchment and turn the pears to the other side, then replace the parchment cover. Simmer until the pears are just tender when pierced, 10 to 12 minutes longer. They will continue to cook as they cool so don’t overcook.

With a slotted spoon, transfer the pears to a refrigerator container. Simmer the poaching liquid until reduced to ¾ cup. Cool the syrup completely, then pour it over the pears. Cover and refrigerate for at least 8 hours or up to 1 day, turning the pears in the syrup every couple of hours so they color evenly.

To make the ricotta cream, put the ricotta, sugar, and vanilla in a food processor and process until smooth.

At serving time, cut each pear in half lengthwise and core with a melon baller. Put each pear half on cutting board, cut side down. Thinly slice lengthwise, leaving the slices attached at the stem end.

Put a pear half on dessert plate. Gently press on each pear half with your hand to fan the slices. Put a dollop of ricotta cream alongside and sprinkle the ricotta cream with the pistachios. Spoon a little of the poaching syrup over the pears.

Author: Janet Fletcher
Source: Eating Local

Happy Thanksgiving!


October 30, 2014

Maple-Roasted Delicata Squash Recipe

ingredients

We are so excited to announce that we are now offering Mead & Mead’s Maple Syrup to our Farm Fresh To You customers.  In honor of today’s unveiling, we wanted to share one of our favorite quick and easy go-to recipes that doesn’t scrimp in the taste category.  This healthy fall favorite recipe only requires four ingredients and can be made in less than 30 minutes. 

delicata squash-cut

First, cut the squash in half vertically and scrape out all of the seeds.

preparing maple-roasted delicata squash


Next, cut each half into 3/4-inch thick slices.  In a bowl, toss the slices in the olive oil, mayple syrup and salt. Make sure to toss well so that each slice is coated.  Arrange slices on a large baking sheet.

maple-roasted delicata squash


Bake in the oven until tender and starting to brown, about 15-20 minutes, flipping once halfway through. Allow to cool slightly, then remove from the baking sheet. Serve and enjoy.
 
Maple-Roasted Delicata Squash

INGREDIENTS:
3-4 pounds delicata squash (about 3 regular size squash) 
2 tablespoons of olive oil 
2 tablespoons of maple syrup
1 teaspoon salt

DIRECTIONS: 
Preheat oven to 425°F.

Cut the squash in half vertically. Scrape out all of the seeds. Cut each half into 3/4-inch thick slices.
In a bowl, toss the slices in olive oil, maple syrup and salt. Make sure to toss well so that each slice is coated.  Arrange slices on a large baking sheet.

 
Bake in the oven until tender and starting to brown, about 15-20 minutes, flipping once halfway through. Allow to cool slightly, then remove from the baking sheet. Serve and enjoy.

About Mead & Mead:
Mead and Mead’s Maple Syrup was created because of a passion for environmental sustainability and preserving and protecting New England’s maple forests. Having grown up on a family farm in the Berkshires, Winter Mead noticed that maple syrup was a great way for people to enjoy a homemade sweetener that tasted great and helped preserve and protect the livelihood of local farmers. Mead and Mead’s offers 100% pure maple syrup and related products that are produced on their family’s farm as well as other maple farms in greater New England.


How To Add Delicata Squash, Maple Syrup and Olive Oil to Your Delivery:
CSA members - head on over to our online Farm Stand Market to customize your upcoming delivery. Market is open from noon on Thursday until 10 am, 2 days before your scheduled delivery day. After you confirm your produce items, click the orange button "Confirm and Continue To Other Farm Products" to add the products to your delivery.

October 23, 2014

Black Valentine Bean and Roasted Tomato Chili with Quinoa


Fall has finally seemed to get into the swing of things, bringing cool weather and sending us to drag out stock pots and reach for oven dials. Here's a delicious way to enjoy the bridge between the seasons from one of our CSA members, Holly. 

Find a new favorite with Black Valentines, an heirloom bean similar to a kidney bean in flavor and flexibility. Grown by Community Grains, a fifth generation, California family farm, these beans can be added to your produce deliveries by customizing your Farm Fresh To You box in our Farm Stand Market! Learn more at the bottom of this post. 


By Holly of Buttercup and Bourbon
With endless possibilities and flavors to explore, chili is a great vehicle to try out new spices, peppers, and beans. For this vegan version of the spicy stew, I have stepped out of the can and cooked up my own black beans; Black Valentine beans to be exact!

black bean and quinoa chili topped with avocado


With these artisan beans as the heart of the chili, a base of roasted peppers and tomatoes add another dimension of smokey and spicy flavors to the mix. Packed with plenty of protein, you don't have to worry about missing the beef when you dip your spoon into this bowl!

chili with roasted tomatoes, black beans, and quinoa

Black Valentine Bean and Roasted Tomato Chili with Quinoa

INGREDIENTS:
  • 2 cups dried Black Valentine beans * 
  • 8 cups water
  • 1 small yellow onion, chopped
  • 1 red bell pepper, chopped
  • 4 cloves garlic, minced
  • 6 Roma tomatoes, halved
  • 1-3 jalapeno peppers, stemmed, halved and seeded (leave the seeds if you want extra heat!)
  • 1 poblano pepper, stemmed, halved and seeded
  • 2 tablespoons chili powder
  • 1 teaspoon oregano
  • 1 1/2 teaspoons ground cumin
  • 1 teaspoon salt
  • 1/4 teaspoon ground black pepper
  • 1 cup corn, about 1 ear (frozen is a good choice during the fall)
  • 1 cup tomato sauce
  • 1 cup of quinoa, rinsed
  • 1 avocado, cubed, for serving
This heirloom bean is similar to kidney beans in flavor and flexibility. Try substituting Black Valentine beans in all your favorite kidney bean recipes.


DIRECTIONS:
Soak the dried beans overnight in 6 cups of water and remove any beans that float.

After the beans have soaked, drain and place in a large soup pot. Add the water, onion, bell pepper and garlic to the pot and bring to a boil. After the bean mixture comes to a boil, reduce the heat to a simmer and cover until the beans are tender, about 60 to 90 minutes. Once the beans have softened, drain and reserve 1 - 1/2 cups of the cooking liquid. Place beans and cooking liquid aside for later use.

Meanwhile, preheat broiler to high. On an aluminum foiled lined baking sheet, place the Roma tomatoes, jalapenos and poblano pepper cut side down. Broil for 10-12 minutes until the tomatoes and peppers are slightly charred. Remove from heat and set aside to cool to room temperature. After the tomatoes and peppers have cooled, place in a food processor and pulse until chopped and combined. Set aside.

In a large slow-cooker over high heat, add the tomato and pepper mixture, chili powder, cumin, salt, pepper, oregano, beans, corn, and reserved bean cooking liquid. Let cook on high for 30 minutes stirring occasionally. Add the quinoa and tomato sauce to the slow cooker and stir to combine, let cook on high for an additional hour or until the quinoa is cooked through.

Serve the chili topped with cubed avocado and enjoy!

black valentine beans and produce for chili

About Community Grains: 
Community Grains aims to help rebuild a local grain economy in northern California. In addition to offering superior grains, they intend to provide an information-base for understanding grains, milling, and flour use. They aim to facilitate the development of local grains that are healthy and delicious, and educate by sharing information, forming relationships, and strengthening the local community here California through good food.

How To Add Beans to Your Delivery: 
CSA members - head on over to our online Farm Stand Market to customize your upcoming delivery. Market is open from noon on Thursday until 10 am, 2 days before your scheduled delivery day. After you confirm your produce items, click the orange button "Confirm and Continue To Other Farm Products" to add beans to your delivery.  

Not part of our farm family? Find out if we deliver to your neighborhood.

October 17, 2014

A Big Thank You & A Well Deserved Round of Applause


Farm Fresh To You

Farm Fresh To You - Farmer's Market at Oracle

Thank you to everyone for all the support and effort in making our Fall Farm Feast a great success.  We want to give a big shout-out to our sponsors Bon Appétit Management Company, Beneficial State Bank, and Oracle and a very special thanks to our local food business partners, farms and ranches that donated to the dinner.  We couldn’t have done it without you.

Petits Pains

Petits Pains - Farmer's Market at Oracle

Fall Farm Feast, which was co-hosted with the Center for Land-Based learning, was a great opportunity to educate and engage in conversation about the importance of sustainable farming practices, as well as an opportunity to eat some of California's best organic and seasonal food.

Mary - Center for Land-Based Learning

Mary - Center of Land-Based Learning
The event benefited the Kathleen Barsotti Non-Profit for Sustainable Agriculture,
whose mission is to support and provide resources to farm workers and their families, and the Center for Land-Based Learning, which provides hands-on programs that educate California’s youth.


Thad - Farm Fresh To You

Thad (Right) - Farm Fresh To You

Again, thank you from the bottom of our hearts for all the support and encouragement. We hope to see you at our next seasonal dinner. Be sure to check-out our events page for more details.

Prepping Dessert

Prepping for Dessert

OUR LOCAL FOOD BUSINESS PARTNERS, FARMS & RANCHES

FREE SPIRIT FARM
KINGFISHER FARM

Thank you to Nina Suzuki for the great photos!

October 13, 2014

A Vibrant Color Palette

Vibrant Food Cookbook Giveaway
 Photo Credit: Kimberley Hasselbrink
"I love the wonderful clarity and focus of this book: simple, vividly photographed dishes that highlight the unique flavors, colors and textures of every season."
-Alice Waters, author of The Art of Simple Foods
 
Fall is a great time of year; cooler temperatures give way to cozy sweaters and many of us find ourselves gravitating towards warm and delicious comfort foods. But more than that, it is fall’s colorful foliage that keep us day dreaming of this season all year long.  Since many of us eat with our eyes, there is something intuitive about adding the color and hues of autumn to our dinner plate that takes our exploration of food to another level.

San Francisco-based Kimberly Hasselbrink, food photographer and creator of the acclaimed The Year in Food blog, would probably agree. Hasselbrink brings us on a colorful journey with her recent cookbook Vibrant Food. She begins with a single ingredient at the peak of freshness and much like an artist, allows color to be her guide. Each recipe pays artful tribute to the season’s magnificent bounty.

Vibrant Food Cookbook Giveaway
Kimberley Hasselbrink

Organized by season, the 60-plus recipes, ranging from cocktails like Sparkling Pomegranate Punch to appetizers like Persimmon with Broiled Goat Cheese - are broken down by type of seasonal ingredient. This cookbook contains sensible recipes for the home cook, while still inspiring readers to seek out food in new and creative ways.

We are almost halfway through October Unprocessed month and I’m guessing that a colorful recipe book that highlights fall’s most appetizing line-up might inspire you to keep strong and unprocess on.

Here's How To Enter - 


To win a copy of Vibrant Food, simply leave a comment below answering this question by Tuesday, October 28, 2014 (one entry per person please).

What is your favorite vibrant fall ingredient and why?
  
No purchase required. Limit one entry per person, please. Entries will close on Tuesday, October 28, 2014 at 8:00 am. Winners are chosen by Random Number Generator and announced on our blog on Tuesday, October 28, 2014.


Thank you for all the delicious comments! 
The winner chosen at random is Anne who said:

Squash is my favorite fall ingredient. It goes so easily into so many different recipes for breakfast, lunch, and dinner. It stores well and is easy to cook. A picture cook book with recipe ingredients by season is an awesome idea! Can't wait to see your new book!

Vibrant Food Cookbook Giveaway
Photo Credit: Kimberley Hasselbrink

PERSIMMON with BROILED GOAT CHEESE

This is inspired by a dish that I love to serve as an appetizer in the fall. Often I’ll just serve slices of firm Fuyu persimmon with plain goat cheese—that alone is tasty enough to surprise and intrigue guests. But I decided to fancify it a little by broiling the goat cheese, which makes it a warm, melty, tangy, wonderful thing. It’s really important to select firm Fuyu persimmons for this dish. Soft Hachiya persimmons are unripe when firm, and once ripe, they won’t support a slather of cheese.

INGREDIENTS

4 ounces soft, fresh goat cheese
1 tablespoon extra-virgin olive oil
Fine sea salt and freshly ground black pepper
2 Fuyu persimmons, quartered, seeded, and thinly sliced
Fresh thyme, for garnishes
DIRECTIONS

1)   Preheat the broiler.

2)   Place the goat cheese in a ramekin and drizzle the olive oil over the cheese. Sprinkle with salt and pepper. Broil about 6 inches from the heat source for 8 to 10 minutes, until the cheese is a deep golden brown. Allow to cool for a couple minutes.

3)   Spread about a teaspoon of baked goat cheese on each slice of persimmon. Garnish with thyme and black pepper and serve immediately. 


***  
Reprinted with permission from Vibrant Food written and photographed by Kimberley Hasselbrink (Ten Speed Press, © 2014)